
Metal detecting holidays in England with the World's most successful metal detecting club.20 years plus.
Twinned with Midwest Historical Research Society USA.
|
Barcombe Roman Villa Dig Public training course in Excavation Techniques Program |
||||||||||||||||||||||||
|
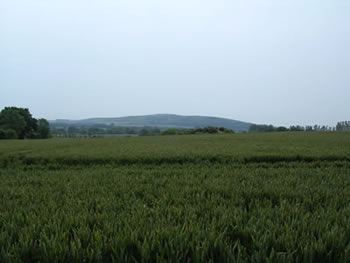
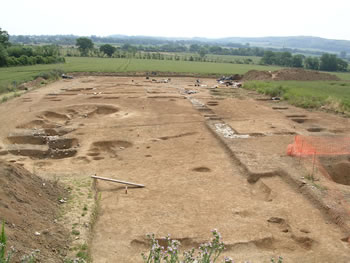
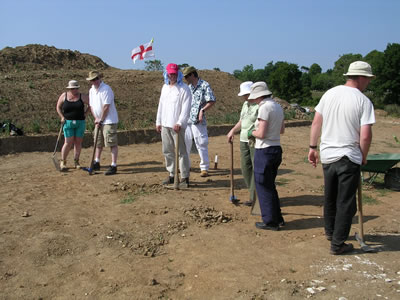
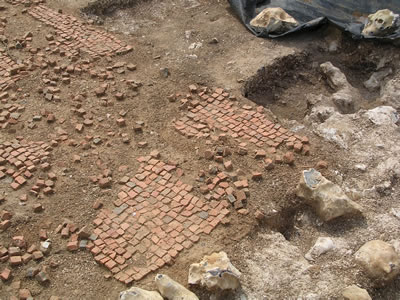
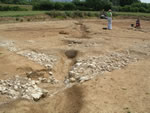
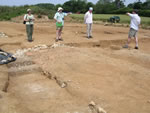
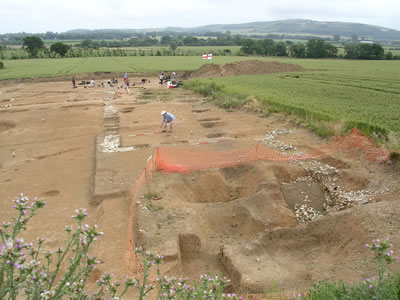
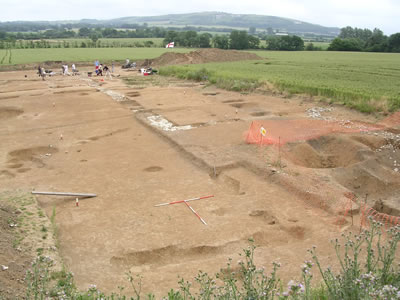
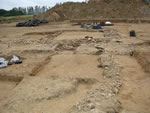
The first picture is of the current site under excavation. It is located at the end of this field with the Downs in the distance overlooking it |
||||||||||||||||||||||||
|
The 5 day course I attended in June is a fascinating insight in to what goes to make up an Archeological dig and the skills and techniques required to take an active part in excavations. It is held at a Roman Villa site that was started in 2001 after a metal detectorist handed in his finds to the local museum. The set up that they have here is a model of detectorists and Archeologists working in perfect harmony together.In fact part of the course includes the use of metal detectors which students can practice with. At the end of the course you are issued with a certificate that can be used when applying to take part in other digs around the country. The amount I learnt was amazing and I thoroughly recommend that every detectorist should take the opportunity to attend one of these courses if they can. I have put together a daily diary so that you can see the kind of subjects covered during the week. They are running the same courses next year so check out there page, it only costs 150 pounds for the 5 days training.
|
||||||||||||||||||||||||
|
Click on any thumbnail to enlarge Day 1 - Site introduction and Geophysics - Heath and Safety and Excavation Discussion session on previous years digs and observations made. The Villa is a Classic Romano/British design with the gallery and two side rooms. Round and Rectangular houses found together i.e. Celtic round and Roman rectangular Evidence of medieval wall robbing found to build the nearby church Classic position of a villa near road and river transport and also wood for timber and charcoal. Interesting observation is that only 5% of finds are on the surface at any one time Equipment Discussion and hands on use of the types of equipment that can be used to aid the dig, Magnetometers, Metal detectors, Dowsing, Bowsing and Geophysics etc. Resistively Meters
The amount of water present in the soil is affected by some archaeological features. For example, if you have a wall under the surface, then there is less soil to store moisture, which will evaporate quicker, making that patch of ground high resistance. Conversely, if you have a ditch or pit, it can store more moisture for longer, giving a lower resistance. Resistance readings taken in a grid can then be turned into an image and interpreted to look for relevant archaeological features. The problem with resistively is that results can be rather poor if the ground is too wet or too dry, i.e. if there is little relative difference between the resistance for different depths of subsoil. Magnetometers - great for finding kilns
Magnetometers
measure the local magnetic field strength. As well as the earths magnetic
field, some archaeological features have a measurable magnetic field.
Burning will cause substances to become magnetised, metals such as iron
have a strong magnetic field, and even the fill of a ditch will show
up because there are magnetic particles in soil, so if you have a deeper
depth of soil because of a ditch, you will get more of a magnetic field
to measure.
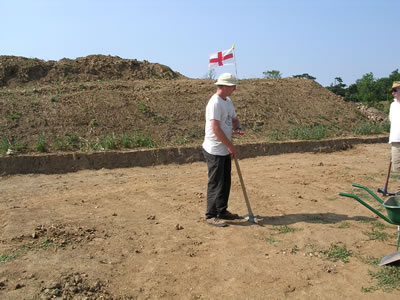
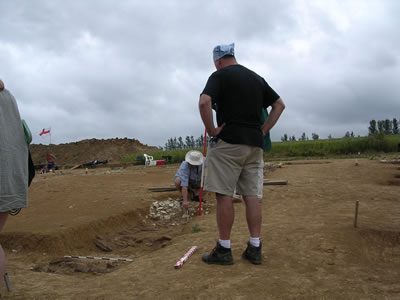
Hands on use of a Resistively Meter and metal detector We plotted a 20m sq. grid to perform the Geophysics on and took readings at every meter. It soon became apparent that we were finding a large wall foundation due to the high resistance. The field we selected had already had a full survey completed and they believe it is a 2nd Roman bath house that will be excavated next year as part of the continuing dig. The device can be linked to a PC and the software will draw the plots for you. A metal detector was demonstrated and guys could have a go themselves. Health and safety on site covering machinery, digging plant and hard-hats.
An important topic as backing onto one of these diggers can be very painful LOL Selecting the right digging equipment for the site, it's location, access and size is critical as it is an expensive exercise. Caterpillar machines have to be towed to the site and require trucks to take the spoil back and forward to the area that is it dumped. They have the ability to rotate 360 degrees and are very quick. The JCB can be driven on the road to the site but uses only it's rear bucket so it does not drive over the cleared area. They are a lot slower at removing the top soil to get down to the Archaeology.
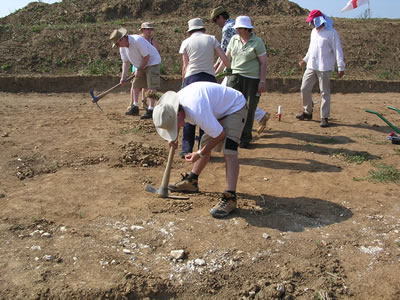
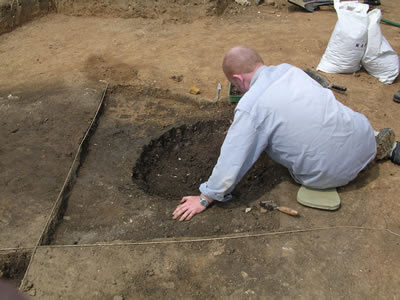
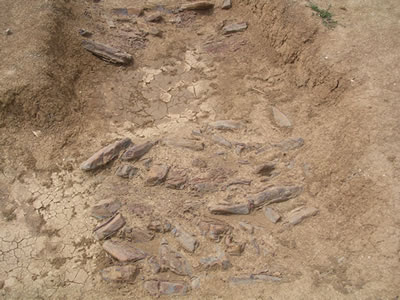
We were then shown all the basic hand digging tools used on the site including mattocks, picks, trowels, brushes etc. We were shown the correct use of the tools and finally let loose on the excavation site with strict supervision. As we troweled a large area together we started to uncover a series of post holes that ran parallel to one of the main walls and it is believed they are a covered way. Even within quite a small area we uncovered Roman pottery and animal bones.
|
||||||||||||||||||||||||
|
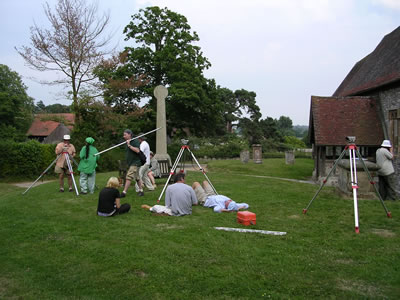
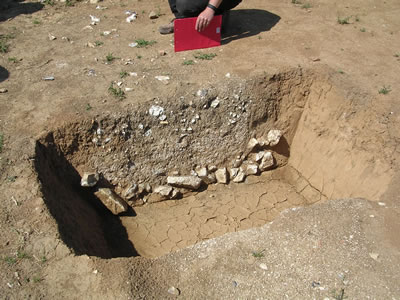
Day 2 - Surveying and Excavation
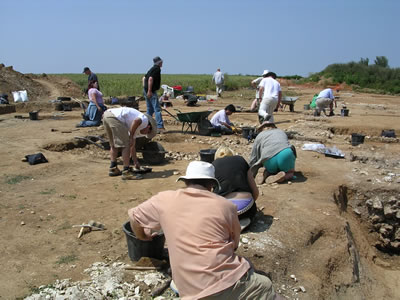
Click on any thumbnail to enlarge Topics covered - finding sea level benchmarks on the side of old buildings and linking them to the 1:10,000 Ordnance survey marks Use of a dumpy level and plotting a site. The afternoon session is back to practicing your excavation techniques buy working on a Roman bath house flint wall foundation.
Click
on any thumbnail to enlarge
|
||||||||||||||||||||||||
|
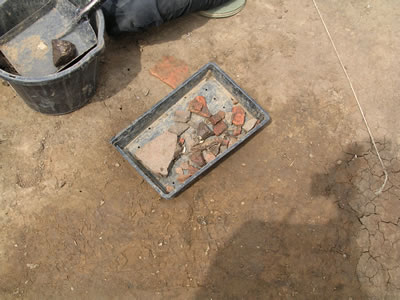
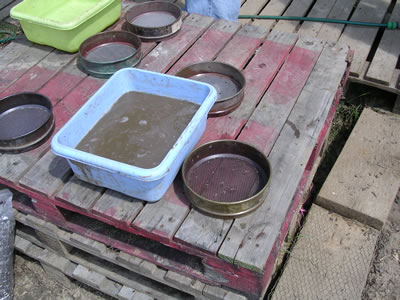
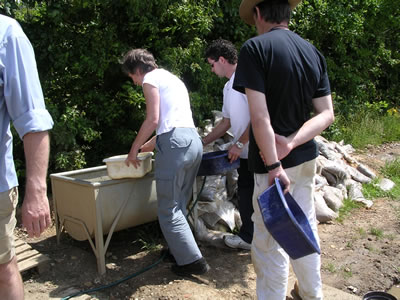
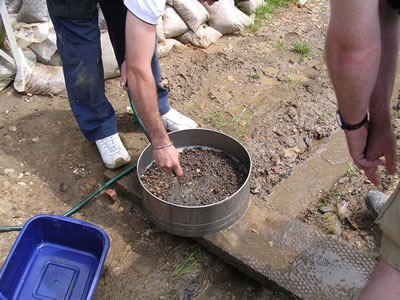
Day 3 Context records and Finds processing
In this system,i.e. the action of digging a pit would be allocated a unique number (known as the ‘cut’) and the layers within it (known as ‘fills’) would be given their own unique numbers. Each context is recorded on a standardised form that prompts a series of questions: location, plan, section and photograph numbers, description, relationship to other contexts, what is it above and below, have samples been taken, who excavated it, how and when? These completed context forms are the heart of the site record. They need to be compiled with thought and care as without them the site cannot be correctly interpreted Finds processing
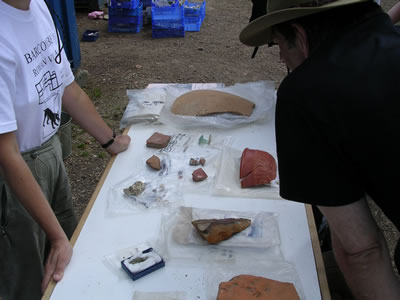
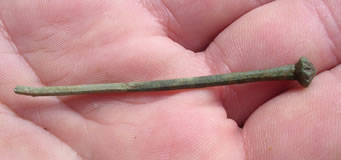
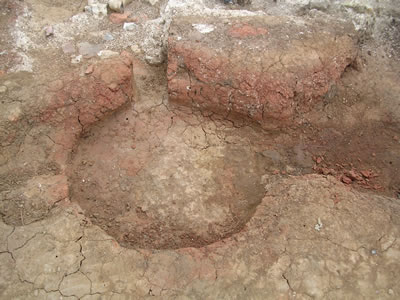
On a dig like the one at Barcombe a full time finds supervisor is employed. They need to be well organised and a good supervisor.If the site is waterlogged then a full time conservator is required. Pottery The course explains all the types of pottery finds made and you get to handle the different types, Roman box flue, floor tiles, pots etc. The type of firing and temporizing agents helps to identify the find, i.e. low fired can be prehistoric and Saxon.The cleaning methods used are generally cold water and a tooth brush. An important aspect to the finds is recording using the site context number and numbering of the find with a felt tip pen. Flint Cleaned and recorded Glass - wash and mark glass, particular care with Medieval glass that must be kept damp to prevent drying and cracking. Iron - let it dry out and dry brush it. Seal the find and add silica gel Charcoal - sent to specialists Bones - wash and mark Wall plaster - leave alone and don't mark, pack carefully Leather - recreate the burial conditions and pack in tub and place with soil. The final season the day is to process bags of soil samples taken from the site by using various graded grid meshes and water to capture the various finds. Charcoal, seeds, animal and fish bones, pottery etc . One of the guys was lucky to sieve out a complete decorated Roman pin.
|
||||||||||||||||||||||||
|
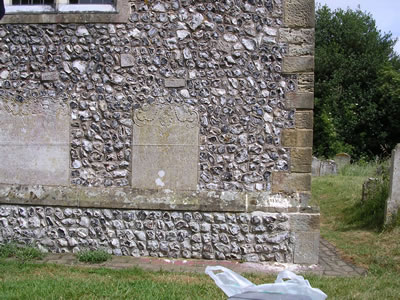
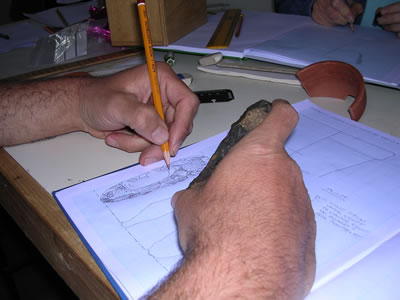
Day 4 Excavation - Planning and section drawing (under construction) The first half day is back on site practicing our excavation skills on part of the Roman bathhouse wall. The afternoon session covers site drawing and records. Pre excavation plans and section drawings. A practical exercise in the drawing the site of a church using a string level and plotting points onto graph paper. Use of basic drawing conventions, cross hatching etc. Use of the 1 meter drawing frame on site to help recording Techniques to draw pots and flints, use of the radius diagram.
How to draw a flint |
||||||||||||||||||||||||
|
Day 5 Environmental - Photography
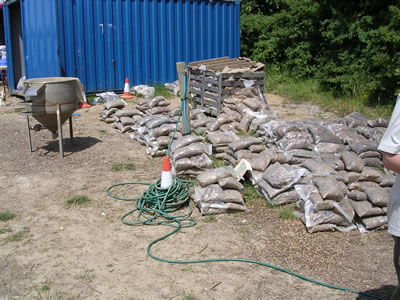
Presentation on the environmental and economic interest in the site. Animal Vegetable and mineral ( Flora, forna and Geo). Normally 20 liters of soil is taken from a clean area for testing. The soil is sent to the lab for microscopic remains. Pollen survives in acid soil. Seeds might survive as fossilized ( found quite a few on day 3 during finds processing). If the ground is waterlogged then they need to be kept wet if excavated. Charcoal is evidence of plants and is chemically stable Black soil is carbonised Wood survives in waterlogged conditions or very dry conditions like Egyptian tombs. Techniques to date the finds include, Radio carbon and Dendrocronology (rings on trees) Final session is photography and using scales.
Summary of Equipment 4" WHS Trowelthis is the standard small excavation tool Dental pick used for very delicate excavation work. i.e. skulls, jewellery etc Arrows used for setting the height of a section string line Bulldog clips for securing tape measure to arrows Line Level used for levelling a section drawing string line Staff the extendable stick used with a dumpy level Tripod the legs used to sit the dumpy on Dumpy Level used for spot height and levelling of site plans, small-finds and section string lines to the local datum (aod) or temporary bench mark (tbm) Grid irons or pegs used to set out a grid & stub knees on Pegcaps to put on the top of grid pegs, so it doesn't hurt when you stub one! Mattock head basic soil moving tool attaches to a pickaxe handle, it hurts after 8 hours Pickaxe for removing very very hard spoil Shovel used to clear up the mess of a mattock/pickaxe Spade used to clean up baulk edges etc Hand brush used to clean up ready for a photo Hand shovel used as a small spoil shifter when trowelling Dutch or Drag hoe used after the JCB/mechanical excavator has done its work, a site-cleaning tool Wheel Barrow used to remove spoil to spoil heap Buckets used to remove small heaps of spoil to wheel barrow or spoil heap Steel Ranging Rods used in setting up grid and as a scale in general site photography etc Kneeler Pad to save the knees from stone dints 3M hand tape general site measuring rule used in planning and section drawing 20m, 30m 50m 100m tapes used for setting out of site grids, plan and section drawing and tripping over Photographic Scales used to scale artefacts, sections etc in photography Vernier gauge used in scale or life size drawing of smaller artefacts Plumb bob used when drawing plans and sometimes sections 1 & 2 inch paint brushes used when fine excavating with leaf trowel Water resistant draughting film used because it rains when drawing! Chinagraph pencils used to mark pottery shards and finds labels Waterproof Markers used for writing site labels so it stays on in the rain Pencils usually 5H or 6H to draw your plans and sections Masking tape used to stick draughting film to drawing board and fix leaking boots Finds bags used to store, record and locate small artefacts & put the tea bags in Waterproof labels used to 'label up' sections with context numbers Munsell Chart a book of colour swatches for designating soil colours Toblerone Scale rule used for scale drawing or reading drawings not for eating Scalpels used to sharpen pencils, cut section string, fingers etc |
||||||||||||||||||||||||

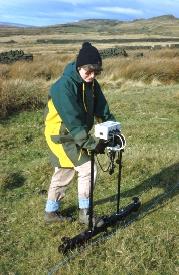 The
first type of equipment available is the Receptivity Meter. For most
amateur groups, it is the most commonly used piece of equipment as it
is both the cheapest and easiest to use. The hardware usually consists
of a box of electronics mounted on a carrying frame, with wires leading
down to a pair of metal spikes that are inserted into the ground. An
electric current is passed through the ground and the box measures the
resistance to the electrical current passing through the ground, hence
the name resistively meter. The amount of resistance is affected by
how much moisture there is in the soil. If there is a lot of moisture
in the soil, you will get low resistance as the electric current passes
through the wet ground easier. Conversely, if there is little moisture,
then there is high resistance to the electric current. The problem with
this setup is that the resistively is also dependent on the amount of
contact the metal probes have with the ground, so most meters have a
cable running to additional set of fixed probes that help it work out
how much contact resistance there is.
The
first type of equipment available is the Receptivity Meter. For most
amateur groups, it is the most commonly used piece of equipment as it
is both the cheapest and easiest to use. The hardware usually consists
of a box of electronics mounted on a carrying frame, with wires leading
down to a pair of metal spikes that are inserted into the ground. An
electric current is passed through the ground and the box measures the
resistance to the electrical current passing through the ground, hence
the name resistively meter. The amount of resistance is affected by
how much moisture there is in the soil. If there is a lot of moisture
in the soil, you will get low resistance as the electric current passes
through the wet ground easier. Conversely, if there is little moisture,
then there is high resistance to the electric current. The problem with
this setup is that the resistively is also dependent on the amount of
contact the metal probes have with the ground, so most meters have a
cable running to additional set of fixed probes that help it work out
how much contact resistance there is.  The
second most commonly used piece of equipment is the magnetometer. It
is rather more expensive and tricky to use, but is favorites with a
lot of people because you can do a survey with a magnetometer a lot
quicker than with a resistively meter.
The
second most commonly used piece of equipment is the magnetometer. It
is rather more expensive and tricky to use, but is favorites with a
lot of people because you can do a survey with a magnetometer a lot
quicker than with a resistively meter. 


